
I woke up one day about 2 weeks into this whole Quarantine situation and decided to research how to make sourdough bread. After seeing a handful of people on my Instagram Stories posting about their own I knew it couldn’t be completely impossible. I grabbed a cup of coffee and began my research on how to create a starter and ultimately, what the process would be like. Before we continue, this is going to get pretty lengthy so I suggest grabbing a cup of coffee and getting comfortable.

How to Get Started…
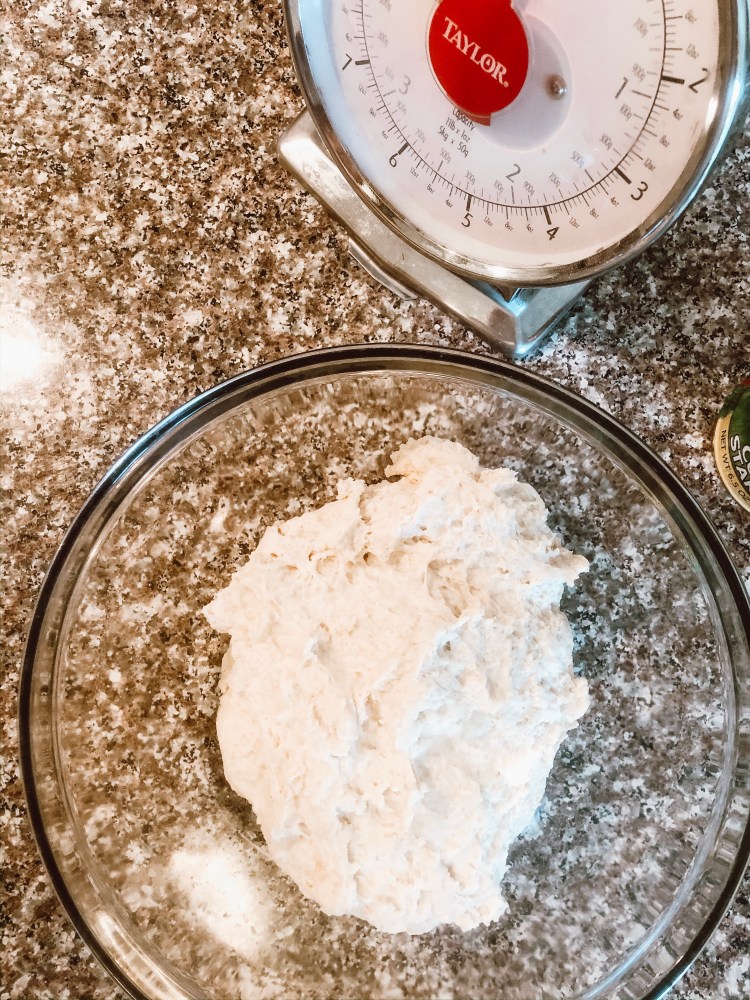
Before you can make sourdough bread (or any of the other amazing sourdough goodies) you are going to need a starter. A sourdough starter is basically a live culture of naturally occurring good bacteria and yeast that will leven your bread (like an activated yeast does for other types of bread). I found a pretty simple starter recipe from The Splendid Table that only needed whole wheat flour, all purpose flour, and water to begin. I mixed my flours and water together and set out on the first part of the sourdough adventure. The key to a healthy starter (I have learned) is to maintain the “feeding” schedule of every 24-48 hours for a solid 2 weeks…I actually joked that keeping my starter alive felt a bit like caring for a child…Chris quickly reminded me that was quite the exaggeration. The first few days of feeding the starter will have an awful, pungent smell that actually made me gag but as the days go on the overly sour smell will give way to a somewhat sweet aroma that is synonymous with delicious bread.
So, you might be thinking, how do I know when my starter is ready to use? Typically 1 days after creating your starter it will be ready to use although some experts say that the best bread comes from a starter that is at least 2 months old. When you feed the starter wait for the amount to double and get bubbly, once that happens it is perfect for making your bread.
Pro Tip: I keep my mature starter in the fridge and feed it weekly, typically right before I am ready to make bread and always keep it on the counter after feeding for maximum development.
Time To Make The Bread…
This is the part that can feel incredibly overwhelming but I promise, once you get the hang of things it really not difficult or labor intensive, it just requires a fair amount of patience. Before beginning lets make sure you have a few key items that will really simplify things:
- A stand mixer with a dough attachment (not totally necessary but speeds things up)
- A kitchen scale, preferably digital
- A dutch oven, I prefer a cast iron as it will give the best heat distribution
- A large clear bowl for proofing
The actual act of creating the dough is very simple but it’s really important as you begin making sourdough to find a process and timeline that works best for you. Generally speaking you will need to “feed” your starter about 4-8 hours before you begin and will need anywhere from 4-14 hours to allow your dough to rise…heat and humidity will all play a factor in the timeline of your process. Since Palm Springs is pretty warm and dry I have found the best schedule for me is:
- 3pm – Feed the starter and leave on the counter
- 7-9pm – Once the starter is ready mix the dough and allow to autolyse (more on that coming up…)
- 1 hour later begin bulk fermentation
- 1 hour later into the over it goes
- 7-9am – cut and shape the dough plus final rise
I have tried a few different timelines to find the best option for me. My advice as you begin is to be patient and not rush the process.

Step 1….Mix your dough and autolyse
You will want to measure out
- 150g bubbly active starter
- 250g filtered room temperature water
- 25g olive oil
- 500g bread flour (I have used all purpose and there isn’t a huge difference)
- 10g fine sea salt
Add all your ingredients to your Kitchenaid and mix with the dough hook. If you don’t have a Kitchenaid add all ingredients to a large bowl and mix by hand until a rough ball forms.
Place the dough “ball” into a clear bowl, cover with a dish towel, and allow to autolyse (the first rest of your dough that will allow the gluten to develop) for 30 – 60 minutes.

Step 2…Bulk fermentation
You will want to work the dough into a tighter ball, cover your bowl with plastic wrap and a dish towel and allow to rise until the dough no longer looks dense and has increased in volume by 2-2.5 times. During this process your dough is really developing strong gluten which makes for better sourdough bread. This is the process you want to be careful not to rush. I have found that leaving the covered bowl on a the kitchen counter overnight produces the best rise and bread. Remember to be patient during this time.
Pro Tip: Use a Sharpie to make a mark on your plastic wrap when you begin the process. Use that mark as your guide to know when the size has doubled.
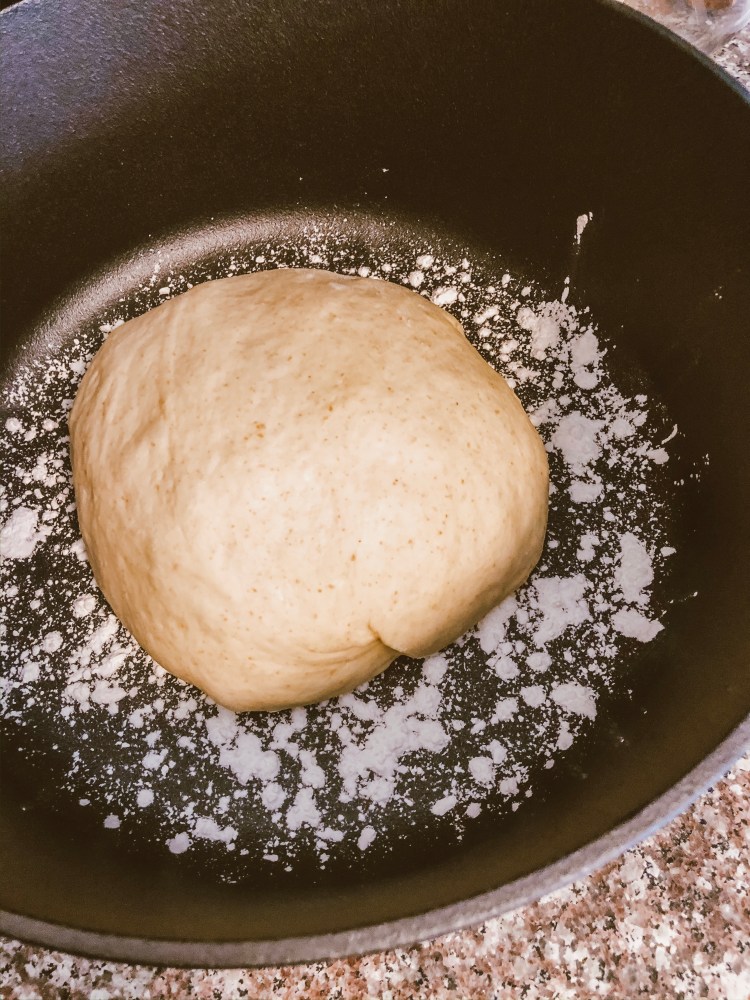
Step 3…Shape your dough
Before you begin shaping you will want to flour a small surface. Remove your dough from the bowl and place on the floured surface coating it just enough to prevent sticking to your hands. Move the dough to an unfloured surface and begin shaping into a ball. I like to preform a series of stretch & folds at this time. Start by taking a piece of the dough and stretching it from top to bottom. Rotate the dough and repeat until you have gone all the way around. Flip your dough so the seams are on the bottom and shape into a ball.

Step 4…Second Rise
I like to bake my bread in a cast iron dutch oven. This method creates an even heat distribution and maintains a good level of humidity. Generously coat the bottom of your pan with corn starch or line with parchment paper to ensure your bread won’t stick. Place your dough into the dutch oven and cover, allowing to rise one more time for 30-60 minutes. At this time preheat your oven to 450 degrees.
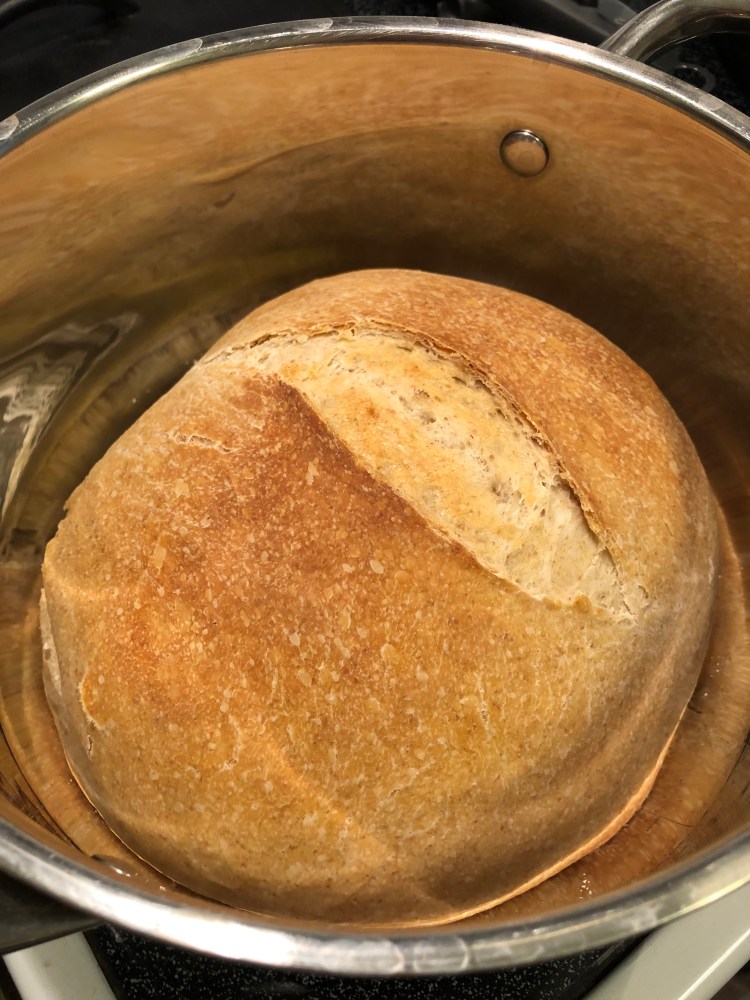
Step 5…Score your bread and bake
Use a small pairing knife to make a 2-3 inch long slash in the top of your bread. This will allow moisture to escape during the baking process. Place your covered cast iron in the oven, reduce the heat to 400 and bake on the center rack for 20 minutes. Remove the lid and bake for another 30 minutes. Crack the oven door for the final 10 minutes to allow moisture to escape. Your total bake time will be 60 minutes. Allow your bread to cool on a wire rack for at least an hour before cutting into it. Trust me on this, cutting too soon results in a tough, chewy texture that is not amazing.
You guys, that’s it, you made bread! Believe me when I tell you baking sourdough bread is so much more than just baking….it’s science, it’s love, and it’s an understanding of the process. This is not an adventure to undertake if you are in a hurry or are unwilling to accept the fact that your first loaf may suck (sorry, it’s just true, mine continue to get better ever single time but that first one wasn’t amazing).


I hope this helps to simplify the process and make it a bit less intimidating. If you decide to try your own be sure to tag me in your posts!
XO, Niki
